These instructions guide you in manually adding a dependent such as a spouse or child to an employee’s benefit plan, on systems upgraded to the latest Wurk release. Your Admin Settings for onboarding new employees and for Life Change events can also trigger the automatic addition of dependents to plans. Other factors in your company setup and in the rules for the benefit plan may affect whether the employee needs to take additional steps to activate the benefit for the dependent; some companies require that the employee enroll or waive the plan for the dependent after you add it to the profile. Rules within the benefit plan control whether you can add a dependent, and which type of dependent. For details about your setup, please check with your administrator. Adding a dependent to an employee benefit plan generally means they will see it under My Info>Benefits>My Benefits.
Menu items and on-screen options may vary depending on your configuration and Security Profile.
START HERE
1. From the Main Menu, click Team>Benefits>Benefit Plans and click the Employee Information icon next to the employee to whom you want offer the benefit.

You can add the same benefit for more than one employee at once by clicking Multiple in the Employee field. This takes you to a screen where you can choose all the employees to whom you will grant the benefit. Once you have chosen the employees, click the Use Filter button to add them and return to this workflow.
To quickly navigate to an employee record, you can search for them by name in the Search field at the top of the main menu.
2. On the screen that follows, click the Employee HR tab and then click ADD NEW. From the list of plans, select the plan you want to offer to the employee and click the flag icon.

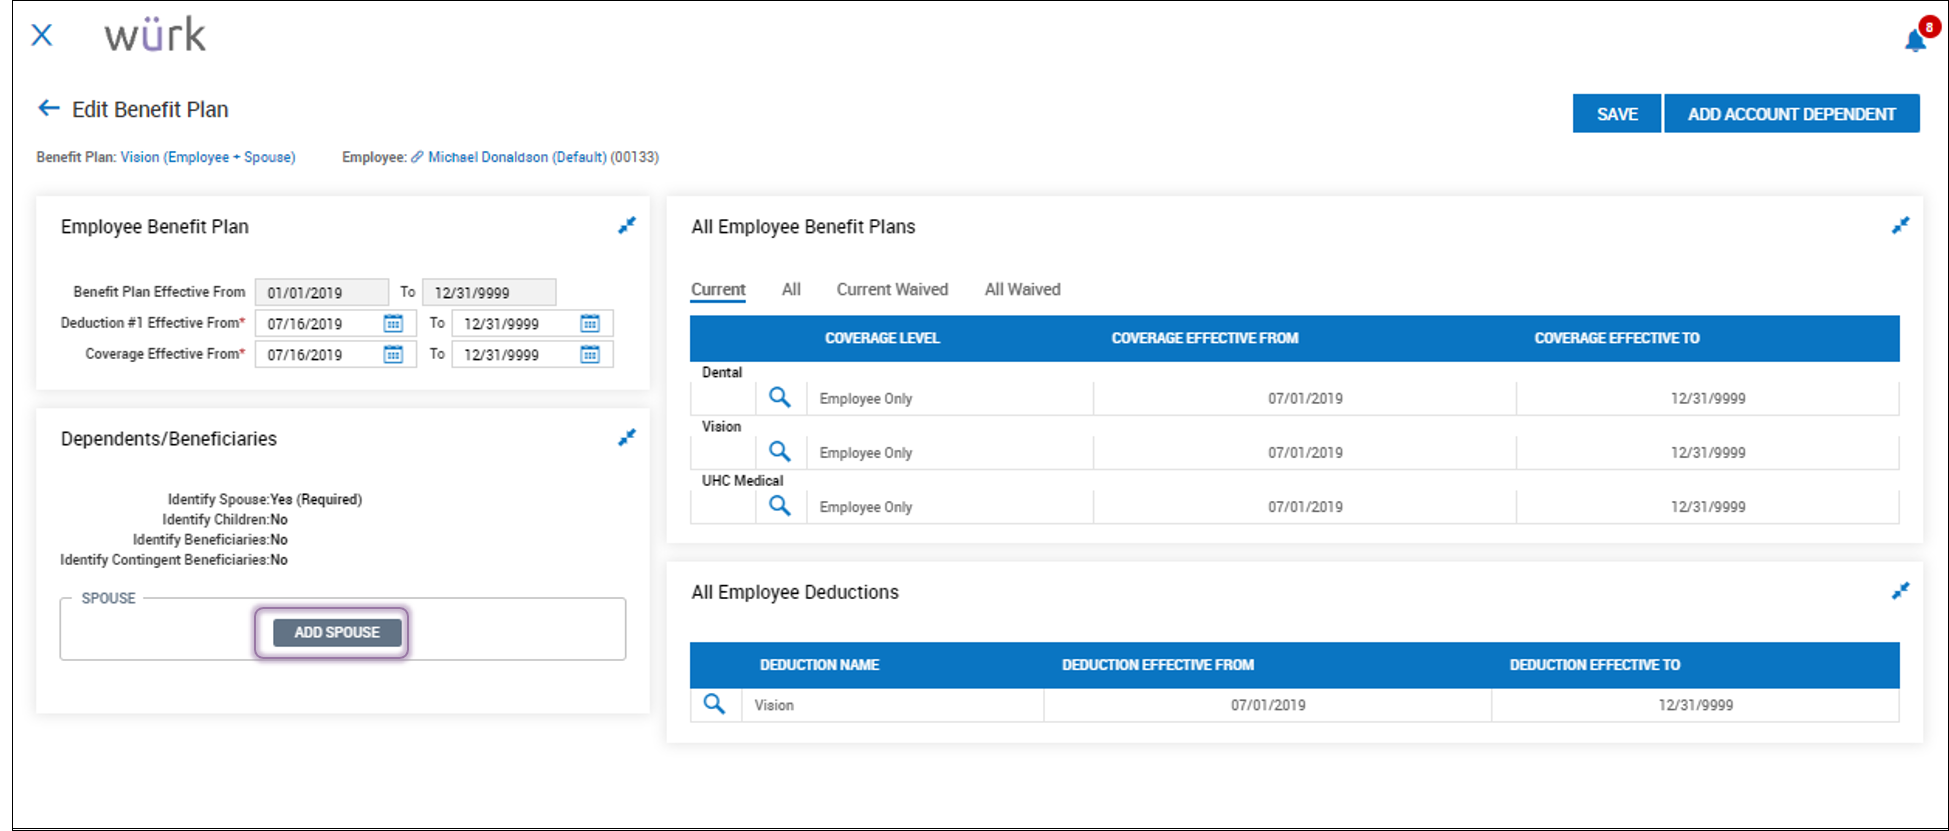
You may be prevented from adding a benefit if it overlaps with an existing one for the employee, for example, if you attempt to add a medical plan with effective dates that overlap one the employee already has. To enable the new plan to be added, you may need adjust the effective dates of the pre-existing plan. Additionally, if the Benefit plan has not been defined to include Spouses or Dependents, the ADD SPOUSE option will not show during this process (shown below). If you need to add these, be sure to choose a plan that includes them.
3. On the next screen, edit the benefit to set the correct effective dates, deduction and coverage timing, and to work with dependents.

You can work with dependents or beneficiaries in two ways:
1) ADD ACCOUNT DEPENDENT enables you to add spouses, partners, children, and other dependents allowed by your company to the employee’s profile, which in turn enables you to include them in eligible plans. The dependent must first be entered into Wurk under the employee’s profile in order for you to be able to add them to a benefit plan.
2) Buttons in the Dependents/Beneficiaries box, such as ADD SPOUSE and ADD CHILD, enable you to select from the dependents defined above and include them in this plan. These appear depending on what the plan allows.
Adding Spouses and Dependents
4. If the benefit plan you are adding for an employee includes Spouses or Dependents, from the Add Benefit Plan screen, click ADD SPOUSE (or ADD CHILD, etc.).
Choose the dependent from the list of contacts for the employee.

5. To select someone to include with the plan, click the flag icon next to their name. If you do not see them listed here, they need to be added under the employee (click the Add Account Dependent button). You will then see them added to the benefit plan.

6. Once the spouse or dependent shows under the benefit plan, specify the EFFECTIVE FROM date and click SAVE.
7. Final step: once you’re done adding the benefit to the employee, click SAVE. The system validates your entries, including checking that your addition does not conflict with other plans the employee has. Once all is complete, Confirm YES to finish. The employee will see the benefit (under My Info>My Benefits>Benefit Plans). The employee will have coverage on the date you set above in the Coverage Effective Date From field.
